New form for creating travel time appointments in Outlook

Articles in the "Outlook Travel Time Appointments" series

  1. Add travel time appointments in Outlook
  2. New form for creating travel time appointments in Outlook [This article]

I still use my code to create travel time appointments in Outlook.  I updated it a little while ago, though, to streamline it.  It now uses a VBA form to ask for the travel from and travel to times in one dialog:

The travel time form now lets you create both appointments from one dialog.

This saves a little real estate in the ribbon because now you only need one button:

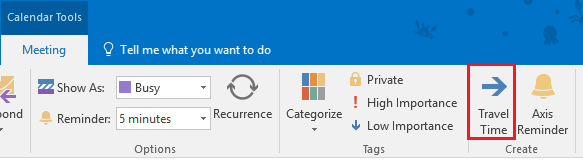
The custom button runs the macro for launching the form and creating the appointments.

It also saves time because you can have it create both appointments in one go.  If you don’t need the to or from appointment created, leave its field blank.  You can download the two form files below, extract them anywhere, then in the VBA editor you can click File->Import File… and select the .frm file.

  TravelTimeForm.zip (1.6 KiB)

You can copy the updated macros below and paste them into ThisOutlookSession in the VBA editor (and delete the macros from the old version).  The OpenOutlookFolder macro hasn’t changed, but is included for convenience.  The CreateTravelAppointment macro is now called CreateAppointment and the only change is that it sets the appointment’s category to Travel.  The CreateTravelToAppointment and CreateTravelFromAppointment macros are now combined into one called CreateTravelAppointment.  This is the macro you want your ribbon button to execute.

Outlook macro to assign retention policy when item is deleted

I described in another post how I need to assign a retention policy tag to items in my Deleted Items folder because there isn’t a retention policy tag set on the folder.  I also set a different tag to items in my Sent Items folder.  While I run the script in that post every week or so, because of the large volume of mail I receive and subsequently delete, the script will sometimes need to process over a thousand items.  Updating that many items with EWS is not the fastest process, so I looked into how Outlook can do it for me at the time a message is put in its respective folder.

Applying a personal tag to sent items is easy because a rule can be created to assign the tag when items are sent:
Outlook RuleTo have a tag assigned when items are moved to the Deleted Items folder, I needed to create a macro that runs when the items are moved.  This can be done with an event that is registered when Outlook starts.  Paste the following code into ThisOutlookSession and restart Outlook.  (You will want to change the two constants to be the GUID and number of days for your tag.)

Both the rule and the macro only run when Outlook is the client doing the operation, so any messages sent or deleted from a mobile device (or OWA) won’t have the respective tag assigned. This means I still have a need to run the script, but it will need update far fewer items and, therefore, complete in much less time.

Add travel time appointments in Outlook

Articles in the "Outlook Travel Time Appointments" series

  1. Add travel time appointments in Outlook [This article]
  2. New form for creating travel time appointments in Outlook

I like having travel time appointments in my calendar so that my free/busy accurately reflects that I am unavailable, but also so that I am reminded with enough time that I need to leave. I used to use an add-in from Instyler (no link since the site is no longer active) that allowed me to add travel to and/or from appointments to a selected calendar item, but it doesn’t work with Outlook 2013. So I chose to write a macro several years ago to do it. Like my attachment rename macro, when someone asked about using it in a newsletter, it gave me an opportunity to fix the main limitation in my use case: multiple accounts.

The original code leveraged the Applicaton.CreateItem() method, which creates the item in the default folder of the respective item type (olAppointmentItem, in this case). But I have long had two Exchange accounts in my profile, work and personal. I couldn’t get it to create the appointment item in the selected calendar. So I figured out how to open a particular calendar based on the folder path of the selected calendar.

The macro works against single-occurrence appointments and meetings. (Working with recurrences is messy.) There are actually three subroutines and one function. Two of the subs are for indicating which type of travel appointment to create, to or from. The third sub is for actually creating the appointment item, and the function is for opening the target calendar. I modified the ribbon for appointment items to add a button for creating a “travel to” appointment and a button for creating a “travel from” appointment. Each will prompt for how long the travel time should be, defaulting to 30 minutes. The travel to appointment sets a reminder, but the return travel appointment does not. It also uses the subject of the selected item to construct the subject of the travel time appointment. Paste these four code blocks into the VBA editor and then you can assign your added buttons to the CreateTravelToAppointment and CreateTravelFromAppointment subroutines.

Rename Outlook attachments before you send them

Edit (June 29,2017): I have made a couple minor changes to the code. One resolves the issue with to-be-renamed attachments being removed from the well when you don’t rename all attachments. The other may resolve the issue with the “path does not exist” error that some have gotten. I can’t be sure because I am unable to reproduce the error.

I often send PowerShell scripts via email. But because .ps1 is a Level 1 attachment, the recipient, if using Outlook, won’t be able to access it (by default). This means I need to rename the file before attaching it to the message. I don’t like doing that, however, because then I have to rename it back after attaching it. I can also compress (zip) the file or make a copy and rename that, but I still have extra files that I then have to delete. I would much rather deal with the file in the context I am sending it: Outlook.

I wrote a VBA macro several years ago that allows me to rename attachments after adding them to the message. Recently, I had an opportunity to share it with somebody so I took the time to update it to accommodate additional scenarios. For example, I discovered that when replying/forwarding a message that has inline images, those are included in the attachment collection, so I had to find a way to exclude those. The same is true when an embedded message is attached. Since the macro was being shared with others, I also added some additional error detection logic to deal with scenarios that normally wouldn’t apply to me or I could deal with one-off.

To use the macro, paste it into ThisOutlookSession in the VBA editor and save it. I modified the ribbon of the new message form (just using the built-in ribbon designer) to add a button that I labeled Rename Attachments and used one of the available icons (there aren’t a lot to choose from), clicking the button runs the macro. (You have to change the default macro security settings in the Trust Center because it isn’t digitally signed.)

Finally, a replacement for Lookout, aptly named Lookeen

After Microsoft bought Lookout, by far the best Outlook indexer, they incorporated its functionality into Windows Desktop Search.  WDS is a horrible app, in my opinion.  Microsoft chose to intentionally disallow Lookout as an add-in in Outlook 2007.  I have tried other indexers that work with Outlook, but none could compare to the efficient and fast Lookout.  I settled on Nelson Email Organizer (NEO), which is a standalone application.  It does do some nice things, but it just isn’t the same.

A successor to Lookout has found: Lookeen.  Like Lookout, it is a COM add-in just for indexing your mailbox (not a bloated app that also indexes your mailbox).  It is very fast, and offers a nice feature that Lookout never did: it display results in a tabbed window, so you can view results by their item type (messages, appointments, contacts, files, etc.).  Lookeen is in beta right now, but you can download it and give it a try.  I haven’t tried any complex searches, but my early results are very positive.

Limitation using automatic formatting in all versions of Outlook

There is a limitation in the use of automatic formatting to control how a message is displayed in a folder’s message list.  I had been trying to use automatic formatting to change the color of messages in a particular folder if they contain a certain word in the body.  I have a rule that moves some daily reports I receive into the folder, and rather than open each report if nothing has changed in the results of the report since it last ran, I wanted to have messages that contain a word that is in them when they have been updated to display differently.  This way I can simply delete the reports with unchanged data, but still open them if I want to (which is why I am not using a rule to delete them upon arrival).

However, the automatic formatting was not being applied to messages that contained the keyword.  I tried several different ways within the conditions editor of applying the formatting, all with the same results.  I decided to open a case with Microsoft since we have loads of Premier incidents available to use.  I had to work through several engineers until I finally got to the Outlook development team who had to look at the source code to determine why it wasn’t working.

That is when they discovered the culprit: a limitation that is by design.  When using automatic formatting, only the first 256 characters of the message body will be searched.  This is for performance reasons.  I couldn’t understand why this would be the case since rules will search all of a message body.  Then I realized why and it does make sense:  Automatic formatting is part of the view for a folder.  Views are calculated and applied each time you switch to that folder, so displaying the font face/color/size and bold/italics of each message in the folder list is dynamically applied each time you switch to the folder.  The default automatic formatting rules for a folder include unread, overdue, and expired messages, plus group headers, etc.  There is definitely a performance risk if Outlook had to search the entire message body of every message in a folder to determine how it should be displayed.  To mitigate this, message body searches are limited to 256 characters when part of automatic formatting.

Rules aren’t subject to this limitation because they are one-time processes.  Rules are applied only when a message arrives or is sent (or when you manually run one).  So the workaround for my issue is to use a rule to search the body for a keyword, assign a category to it if there is a match, and then move it to the folder.  I then use automatic formatting to change how a message is displayed if the category is the one I assigned.  I have to create a rule for each keyword I am looking for (since I am also looking for reports that have errors), which isn’t as efficient as defining multiple automatic formatting rules, but it is an acceptable workaround since the results are the same.